
It’s important to understand that drip edge installation is different for eaves and rakes. After your roof deck has been prepared, and before you install underlayment, you need to install drip edges at the eaves. You install drip edges on the rakes after you install the underlayment. Plus, this step-by-step guide to drip edge installation will also explain how to cut drip edges for corners and peaks.
- Step One:If using a Type C drip edge, you can install a furring strip to increase its performance. A furring edge is a strip of one-by-two wood you install on the vertical surface of the house just beneath the roof’s edge. When you install the drip edge over this strip, it keeps the lower flange further from the home’s siding, which helps to keep water further from the home.
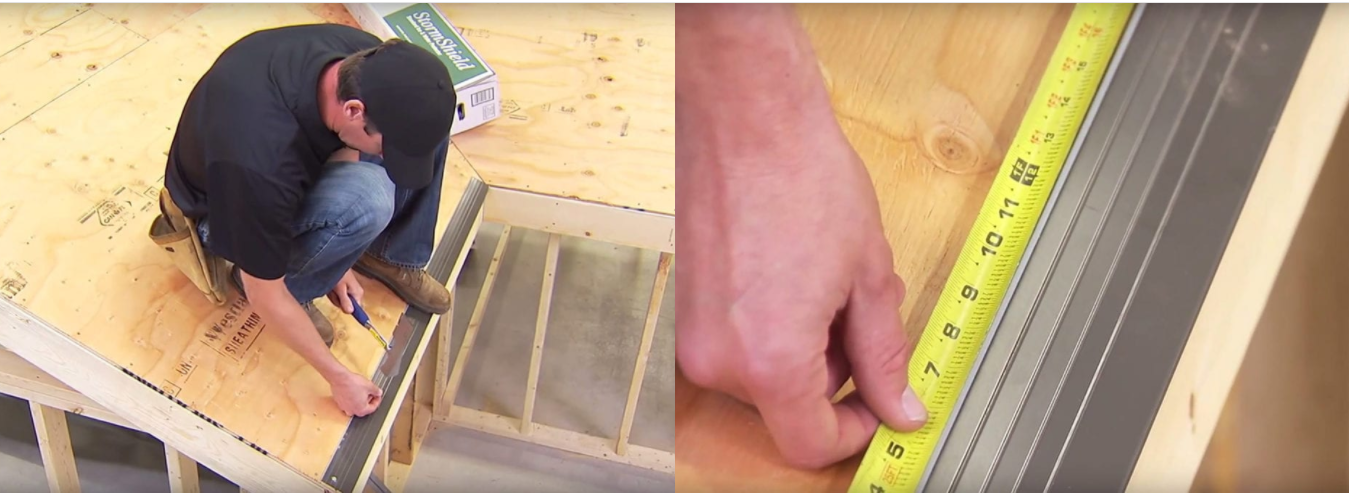
- Step Two:Install drip edges on the eaves first. Place the drip edge down, aligning it so water will drip into the gutters. The end with the flange or flare should point down and away from the roof.
- Step Three:Use roofing nails to secure the drip edge. Nail high up on the drip edge so that the shingles will cover the nails. Ideally, you’d nail about every 12 inches, and in no circumstances should you have 16 inches or more between nails. When you place the next drip edge piece, it should overlap the first by an inch.
 Step Two: Install drip edges on the eaves first.Step Three: Use roofing nails to secure the drip edge. Ideally, you’d nail about every 12 inches, and in no circumstances should you have 16 inches or more between nails.
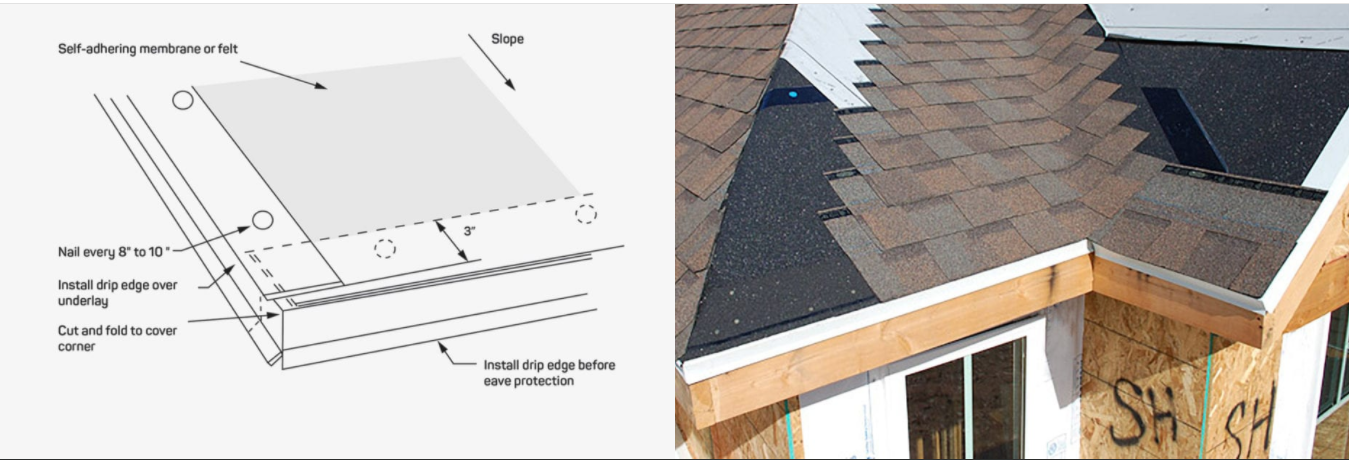
- Step Four:When you reach a corner where an eave and rake edge meet, you need to make a cut to ensure a proper fit. First, place your drip edge on the rake edge. Mark where the drip edge begins to overhang and one inch further out from that overhang.
- Step Five:Cut the entire drip edge by your second mark, so that it only hangs past the edge by an inch. Then, cut out the topmost portion of the drip edge by your first mark. Then, make a perpendicular cut, so that you can remove a square of the drip edge, as you see in the image below.
- Step Six:Install the drip edge as normal. Then, bend in the flap of the drip edge to form a corner. You will complete this corner when you install the drip edges on the rakes.
Image provided by CASMA - Step Seven:Once you’ve covered the eaves with a drip edge, it’s time to install your underlayment. This way, the underlayment is over the drip edge on the eaves, but under the drip edge on the rakes.

Step Six: Install the drip edge as normal.
Image provided by CASMAStep Seven: Once you’ve covered the eaves with a drip edge, it’s time to install your underlayment.
- Step Eight:Then, install drip edges on the rakes. Use nails as before.
- Step Nine:When you get to a corner where the rake and eave edge meet, simply install the rake’s drip edge on top of the flap you left when installing the eave’s drip edge.
 Step Nine: Install the rake’s drip edge on top of the flapStep Eleven: Fold the drip edge to fit over the ridge.
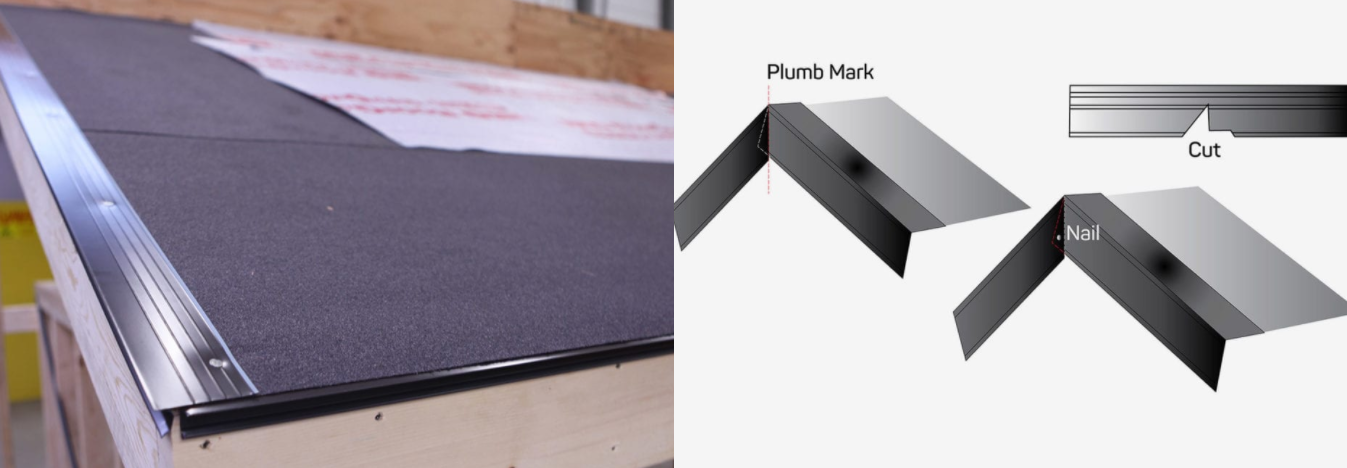
- Step Ten:When you reach the roof’s ridge, you need to make yet another cut in your drip edge. Hold the drip edge up to the ridge and make a mark along where the drip edge exceeds the roof. Make a straight cut through the bottom of the drip edge with your tin snips.
- Step Eleven:Fold the drip edge to fit over the ridge. Mark the plumb line, or centerline, as in the image below. Cut the topmost part of the drip edge along this line to create a finished look. Place a single nail in the outside piece to hold the drip edge in place.
You should always check with your local building code to see if there are any extra rules you are required to follow during drip edge installation.